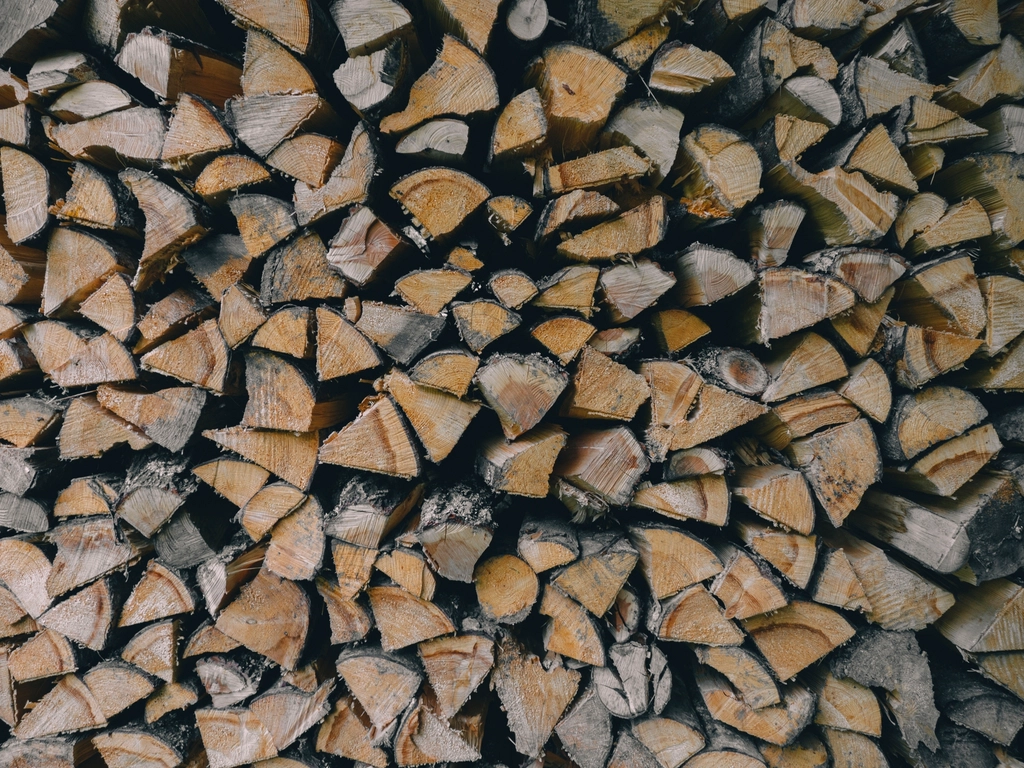
The Winter Supply Starts in Spring
A cabin heated with wood runs on a calendar that has very little to do with the thermostat. The cold arrives in November, but the work that makes November comfortable happens in March, April and May, when the sap is down, the ground is firm and the bugs have not yet found you. Every cabin owner who has scrambled in October to buy a truckload of half-seasoned oak has learned the same lesson: wood does not dry on demand. It dries on its own schedule, and your job is to give it enough time and enough air.
What follows is the practical shape of a winter wood supply for an Appalachian cabin — how much you actually need, how to split it, how to stack it so it dries instead of rotting, and the small habits that separate a woodpile you trust from a woodpile that hisses and smolders all season.
How Much Wood Is Enough
The honest answer depends on the cabin, the stove and how you live in it. A tight, insulated 900-square-foot cabin used on weekends through the winter might burn a cord and a half. The same cabin lived in full time, with a stove that also heats the water and the morning coffee, can run through four or five. An old, drafty place with single-pane windows and a fieldstone foundation will eat more than anyone expects.
A cord is a stacked pile four feet high, four feet deep and eight feet long — 128 cubic feet including the air between the pieces. That measurement matters when you buy, because the loose truckload and the face cord are elastic units that tend to shrink in the seller’s favor.
- Measure your first season honestly. Stack what you burn in one winter against a marked wall or a pair of posts, and you will never have to guess again. Most people overestimate their consumption in the first year and underestimate it in the fifth, once they have started using the stove for shoulder-season mornings too.
- Build in a surplus year. The goal is not to finish each winter at zero. It is to end March with roughly a third of a supply still stacked, so that next year’s wood gets a full extra season of drying. Two years ahead is the standard that experienced cabin owners quietly aim for.
- Account for the shoulder seasons. Cool damp weeks in September and April burn a surprising amount of wood in small fires. Softer species and smaller splits cover this without wasting your best hardwood.
- Remember that wet wood burns more. Unseasoned wood spends a large share of its energy boiling off its own water. A cord of properly dried oak does the work of nearly two cords of green oak, so drying time is effectively free firewood.
What Grows Here and What Burns Well
The mixed hardwood forest of the Appalachians is one of the best firewood landscapes in North America, which is a lucky thing for anyone with a stove. But not every tree earns the same place in the stack, and part of running a good woodpile is sorting species as you cut.
The heavy hitters
Oak, hickory, black locust, sugar maple, beech and ash are the dense, high-output woods that carry the cold months. Hickory and black locust sit at the top of the heap for heat per volume, and locust has the useful habit of being nearly rot-proof, so it can sit outside and wait for you. Oak is superb but stubborn: red and white oak want a full two years to dry, and a single summer is not enough no matter what the seller says.
The workhorses and the kindling
Red maple, birch, cherry and elm sit in the middle. Cherry smells wonderful and splits easily. Elm is a heat source and a personal insult at the same time, because its interlocked grain resists splitting; a hydraulic splitter, or a decision to leave it for somebody else, are both reasonable responses. Softer woods — poplar, pine, hemlock — dry fast and light the stove quickly, which makes them ideal kindling and shoulder-season wood even though nobody wants them at midnight in January.
What to leave out of the pile
Never burn treated lumber, painted or stained wood, pallets of unknown origin, or driftwood carrying salt. They put corrosive and genuinely toxic compounds into the flue and the room. Poison ivy vines clinging to a trunk deserve their own warning: burning them puts urushiol into the smoke, and inhaling that smoke is a medical emergency, not an inconvenience. Strip hairy vines off logs before they reach the splitting area, and wash the gloves afterward.
Cutting to Length Before You Split
Bucking is the unglamorous step that decides how pleasant the rest of the job will be. Cut everything to a consistent length that is at least three inches shorter than the firebox, so that a piece that is slightly bowed still fits without wrestling. Sixteen inches is the common default for cabin stoves, but measure your own before you commit a whole winter to a number.
- Mark instead of eyeballing. A stick cut to your firebox length, or a strip of tape on the saw bar, keeps the whole pile uniform. Uniform rounds stack tightly and stack safely; a pile of random lengths slumps.
- Buck at a comfortable height. Rolling logs onto a pair of skids or a sawbuck saves your back and keeps the chain out of the dirt. One touch of soil dulls a chain faster than an hour of cutting.
- Cut standing dead and blowdown first. Trees that died standing are already partly dry and can be ready in a single season. A tree lying on wet ground for two years, by contrast, is often punky on the underside and worth less than the effort of hauling it.
- Respect the tension in a leaning log. Compression and tension sides pinch a bar or spring apart violently. Cut a relief notch on the compression side first, and never stand where a released trunk would swing.
Splitting Without Wearing Yourself Out
Splitting is a technique problem disguised as a strength problem. The people who make it look effortless are usually letting the tool and the wood do most of the work.
Tools that match the wood
A six-pound splitting maul handles most rounds. A dedicated splitting axe with a sharp, wedge-shaped head is faster and less tiring on straight-grained wood such as ash, cherry and maple. Steel wedges and a sledge handle knotty crotch pieces that will otherwise ruin an afternoon. A hydraulic splitter earns its keep if you burn more than three cords a year, or if elm and knotty oak dominate your woodlot.
The mechanics that matter
Set the round on a low, broad chopping block rather than the ground; the block stops the head cleanly and keeps the shock from traveling back into your wrists. Aim at an existing check or crack rather than the center of the face. Strike toward the edge of a large round and work around it, taking slabs off the outside, instead of trying to halve a thirty-inch monster in one blow. Let the maul fall — the swing is a controlled drop, not a bench press.
- Split green when you can. Most species split more easily wet than dry, and splitting early exposes far more surface area to the drying air. Oak and beech are noticeably harder once they have sat around in rounds.
- Use a tire or a ring. An old tire or a short section of stovepipe set on the block holds a round together so you can reduce it to six pieces without bending over to reset each one.
- Size for the stove, not for pride. A mix of thin, medium and fat splits gives you control: thin for a fast morning fire, fat for an overnight burn. All-large is a common beginner mistake.
- Wear the boring safety gear. Eye protection, gloves, and boots with a hard toe. Wood chips and glancing maul heads are the two injuries that show up every single season.
Stacking So the Wood Actually Dries
A stack is a drying rack, not a storage bin. Everything about how you build it should serve airflow.
Get the bottom course off the ground on pallets, treated four-by-fours, or a pair of rot-resistant poles. Ground contact wicks moisture straight into the wood and invites carpenter ants and termites toward the cabin. Orient the row so the prevailing summer wind blows through the length of it, and keep the rows a single split deep with a hand’s width between parallel rows. Sun helps, but moving air does most of the work.
- Build honest ends. Crisscrossed log-cabin style ends, or a pair of sturdy posts braced outward, hold the row up. A stack that falls over in September is a whole afternoon you did not plan to spend.
- Cover the top only. A sheet of metal roofing or a tarp weighted over the top course sheds rain and snow; wrapping the sides traps humidity and stalls the whole process. Leave the flanks open to the wind.
- Keep the stack away from the cabin wall. Stacked wood against siding holds moisture, hides insects, and in some places creates a fire path. Keep the main supply at a distance and bring only a week or two up to the porch.
- Stack by year, not by species. Label rows or physically separate this winter’s wood from next winter’s. Once the piles blend together, discipline disappears and you will burn the young wood.
Knowing When It Is Ready
Seasoned wood announces itself if you know the signals. The bark loosens or falls off. Checks open across the end grain like the spokes of a wheel. The piece feels light for its size, and two splits knocked together ring rather than thud. Weight loss is dramatic: green oak can be half water, and a fully dry split will have shed a third or more of what it weighed the day it came off the block.
An inexpensive pin moisture meter removes all argument. Split a piece open, press the pins into the fresh interior face, and look for twenty percent or below. Anything over twenty-five percent belongs back in the stack. Burning wet wood is not just inefficient — it deposits creosote in the flue at a rate that turns a routine chimney into a chimney fire waiting for a cold snap.
Rough drying times
- One summer. Poplar, pine, birch, cherry and standing dead softwoods, if split small and stacked in the open by early spring.
- One long season to a year. Ash, maple, hickory and most mid-density hardwoods, given sun and moving air.
- Two full years. Red and white oak, beech, and anything left sitting in large rounds. Nothing you do speeds oak up meaningfully; only time does.
Bringing It Inside
The last stage is the one that touches daily life. Keep a small indoor rack — three or four days of burning — near the stove so that wood warms to room temperature before it goes in. Cold wood absorbs heat before it combusts, while warm dry splits catch immediately and with far less smoke.
Do not stockpile a month of wood indoors. Bark carries beetles, spiders and the occasional overwintering wasp, and a warm room wakes all of them up. Carry in what you need, knock the pieces together outside the door to shed loose bark, and keep a metal ash bucket with a lid for the other end of the cycle. Ashes stay live for days; the bucket goes outside on stone or bare dirt, never on a wooden porch.
Done properly, the whole system becomes a quiet rhythm rather than a chore. You cut and split in cool weather when the work feels good, the stack sits in the sun and wind all summer doing nothing that requires your attention, and by the time the first hard frost silvers the meadow you have a wall of dry hardwood and no anxiety at all about the forecast.